
Yeti Cloud is Nepal’s sole next-generation, managed application hosting platform-as-a-service (PaaS) featuring automated containers.
Its pay-per-usage billing allows businesses to control expenses by only paying for what you use, while automated orchestration enables them to concentrate on growth.
YetiCloud is a cloud platform service where you can host your projects using various technologies.
This is a great alternative if you’re looking to lower your hosting costs.
With built-in features, YetiCloud makes hosting applications easier than ever.
Now, let’s get started with a step-by-step guide to hosting your PHP application on YetiCloud.
Before we begin, make sure you have access to the YetiCloud platform.
Getting Started
The platform has an easy-to-use interface, so you can launch your applications to the cloud quickly without needing to deal with a complicated setup.
This guide will walk you through the basic steps to begin using the platform:
- Create an account
- Deploy your application
Table of contents
- Sign Up: How to Create an Account?
- How can you host an application in Yeti Cloud?
- Step 1: Create an Environment:
- Step 2: Choose Application Server:
- Step 3: Choose Vertical Scaling configurations
- Step 4: Choose Horizontal Scaling Settings:
- Step 5: View Your Pricing Details:
- Step 6: Name Your Environment:
- Step 7: Choose a Database (If Needed):
- Step 8: Choose VPC and Storage (If needed):
- Step 9: Create Your Environment:
- Step 10: Deploy Your PHP App to the Environment:
- How to Use Your Own Domain Name in YetiCloud?
- How to set up your own Domain Name Step-by-Step?
Sign Up: How to Create an Account?
To start using the platform, you’ll need to create an account. If you don’t have one yet, you can sign up through:
- YetiCloud Website (https://app.yetiapp.cloud/)
- Particular Platform dashboard
Platform Dashboard
Access particular platform via Hoster Domain.
1. Expand the menu at the bottom-left corner and select the Signup option:

2. Provide your Email in the form that appeared:
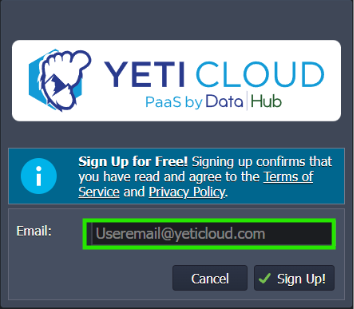
After you sign up, you will get a confirmation email in your Inbox.
If you don’t see it there, check your Spam folder.
Open the email and follow the steps to finish your registration.
#Tip: The account activation link in the email is usually valid for 24 hours (this may vary depending on the hosting provider).
If the link expires, you’ll need to sign up again.
Deploy Application:
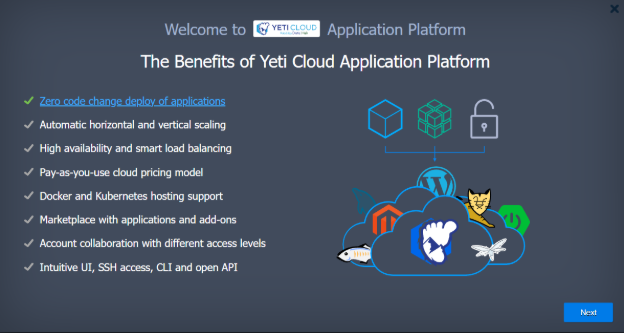
When you open the platform dashboard for the first time, a quick tutorial will automatically start. (You can also launch it anytime by going to Help > Tutorial.)
This tutorial gives you a short overview of the platform and guides you step-by-step through creating your first environment and deploying your application.
You can follow the tutorial or skip it and choose one of the following deployment options:
- Automatic Deployment: Use the Application Marketplace to quickly launch ready-to-use apps.
- Manual Deployment: Set up everything yourself using the platform dashboard.
How can you host an application in Yeti Cloud?
Step 1: Create an Environment:

Image: Dashboard top Navbar
- Goto Dashboard and click New Environment
- You will get the dialog to create new environment like this

Image: Create Environment Dialog
At first, this dialog might look big and a bit confusing but don’t worry, we’ll break it down step by step.
Here, you can choose your preferred environment setup.
At the top of the page, you will see a list of different technologies that you can use for your project.
Some of them are Java, PHP, Ruby, Node.js, .NET, Python, and many more.
You can choose any of these based on what your project needs.
If you need something custom or want to use a public image, just go to the Custom section.
Step 2: Choose Application Server:
We are going to host a PHP, so first, click on PHP.
After that, you need to choose the server your app will run on.

Choose Application Server
- Pick an Apache 2.4.63 from the list
- Or use a custom Docker image, if needed
For now, I’ll just select one of the available Apache and move on.
Step 3: Choose Vertical Scaling configurations

Image: Vertical Scaling
Vertical scaling means adjusting how much power (like CPU and RAM) your app can use.
In this step:
- On the left side (Reserved): choose the minimum resources your app always needs.
- On the right side (Scaling Limit): choose the maximum resources your app can use if needed.
The platform will automatically adjust the resources based on how much your app actually uses. So, you don’t have to worry about scaling manually.
Step 4: Choose Horizontal Scaling Settings:

Image: Horizontal Scaling
Horizontal scaling means running your PHP app on multiple servers to handle more users and traffic.
If you turn on this option:
- An Nginx load balancer will be added automatically.
- This load balancer helps share the traffic between the servers, so everything runs smoothly.
- You can change the default load balancer if you want, but I’ll stick with the default one.

Image: Nginx Load Balancer
You also get to choose how many PHP nodes (servers) you want to use for horizontal scaling.
More nodes = better performance when your app gets busy.
Step 5: View Your Pricing Details:

Image: Pricing Details
Before you finish setting up, it’s a good idea to check how much everything will cost.
On this screen, you can see the pricing details for your PHP application based on how many cloud resources (like CPU, RAM, and storage) you’ve selected.
You can view prices in different ways:
- Hourly: Shows how much you’ll pay per hour if your app is running.
- Daily: Shows the cost per day, which is useful for short-term projects or testing.
- Monthly: Gives you an idea of what you’ll pay if your app runs all month.
This helps you plan your budget. If the price is too high, you can go back and adjust things like:
- Number of cloudlets
- Number of PHP nodes (Say: Number of Nodes – sounds more general)
- Type of scaling
- Storage space or server type
The platform updates the pricing automatically based on your setup, so you can see the cost in real-time as you make changes.
Step 6: Name Your Environment:

Now it’s time to give your environment a name.
Choose a simple and clear name that helps you remember what the app is for, like my-php-app or blog-project.
Once you’ve entered the name, just click “Create Environment”.
If your PHP application doesn’t need a database or other extra features, you can skip adding those and go ahead with the default setup.
The platform will now start creating your environment. This may take a few minutes.
Step 7: Choose a Database (If Needed):

If your PHP app needs a database, you can add one in this step.
I’ve chosen MySQL version 8, but you can pick any database you prefer like:
- MongoDB
- Percona
- MariaDB
- PostgreSQL
- Or others available on the platform
Just like with the application server, you can also set:
- Vertical scaling: how much memory and CPU the database should use
- Horizontal scaling: if you want to use more than one database server
Choose the version and configuration that works best for your project, then continue.
Step 8: Choose VPC and Storage (If needed):
In this step, you can choose:
- A custom VPC (Virtual Private Cloud): This is the private network where your app will run. If you already have a VPC, you can use it. If not, the platform can use the default one.
- A shared storage service: If your app needs to store files (like images, documents, or backups), you can add shared storage here. It’s optional and only needed if your app handles files or large data.
If you don’t need this right now, you can skip this step and move on.
Step 9: Create Your Environment:
Click the “Create” button to start.
The system will build your app environment using the settings you picked. This might take a few minutes.
You will get an email with your database details.
You can see your new environment on the screen.

Image: Environment List
Step 10: Deploy Your PHP App to the Environment:
Now that your environment is ready, let’s add your PHP application. Here’s how you can do it easily:
At the bottom of the page, you’ll find the Deployment Manager. This is where you upload your PHP project.
Option 1: Upload a ZIP File

First, zip your PHP project files on your computer (make sure it includes index.php or your main file).
Go to Deployment Manager > Archive and upload the ZIP file.
Once uploaded, select it and deploy it to your PHP environment.
Option 2: Use GitHub, GitLab, or Other Git Repositories (Most Common Way)

In the Deployment Manager, choose GIT/SVN.
Fill in the details:
- Name: your project’s name
- Repository URL – your GitHub or GitLab link
- Branch – usually main or master
- If the repo is private, you’ll also need:
- Your Git username
- Access token or SSH key
Then click Add + Deploy to upload and run your PHP project or just Add to connect the repo without deploying right away.
Now From Environment Application Server


- Go to your Application Server → click Deployment
- Select Deploy from local File
- Choose Zip File
- Click Environment and check which server you want to deploy.
- Hit Deploy, and your PHP app goes live!
How to Use Your Own Domain Name in YetiCloud?

When you deploy your app in YetiCloud, your website will get a default URL like:
yourproject.ktm.yeticloud.com
This is okay for testing or development, but for your main (live) website, you might want to use your own domain like www.mywebsite.com.
The good news?
You can easily connect to your own domain.
Follow these simple steps:
How to set up your own Domain Name Step-by-Step?
1. Log in to YetiCloud
- Open your YetiCloud dashboard.
- Find the project where you want to use your custom domain.
2. Open Environment Settings

- Click on the Settings (wrench icon) for that project or environment.
3. Add Your Domain

- In your domain registrar, add a CNAME or ANAME record for the required custom domain, pointing it to the current environment.
- Enter your domain name (like www.mywebsite.com) in the custom domain field.
4. Click “Bind”
- Press the Bind button to connect your domain with your YetiCloud app.
P.S. If you want to connect to a custom domain name and configure DNS records, this blog will help you set it up with ease.